Friday, April 28, 2017

Kusama Pop Art Pumpkins


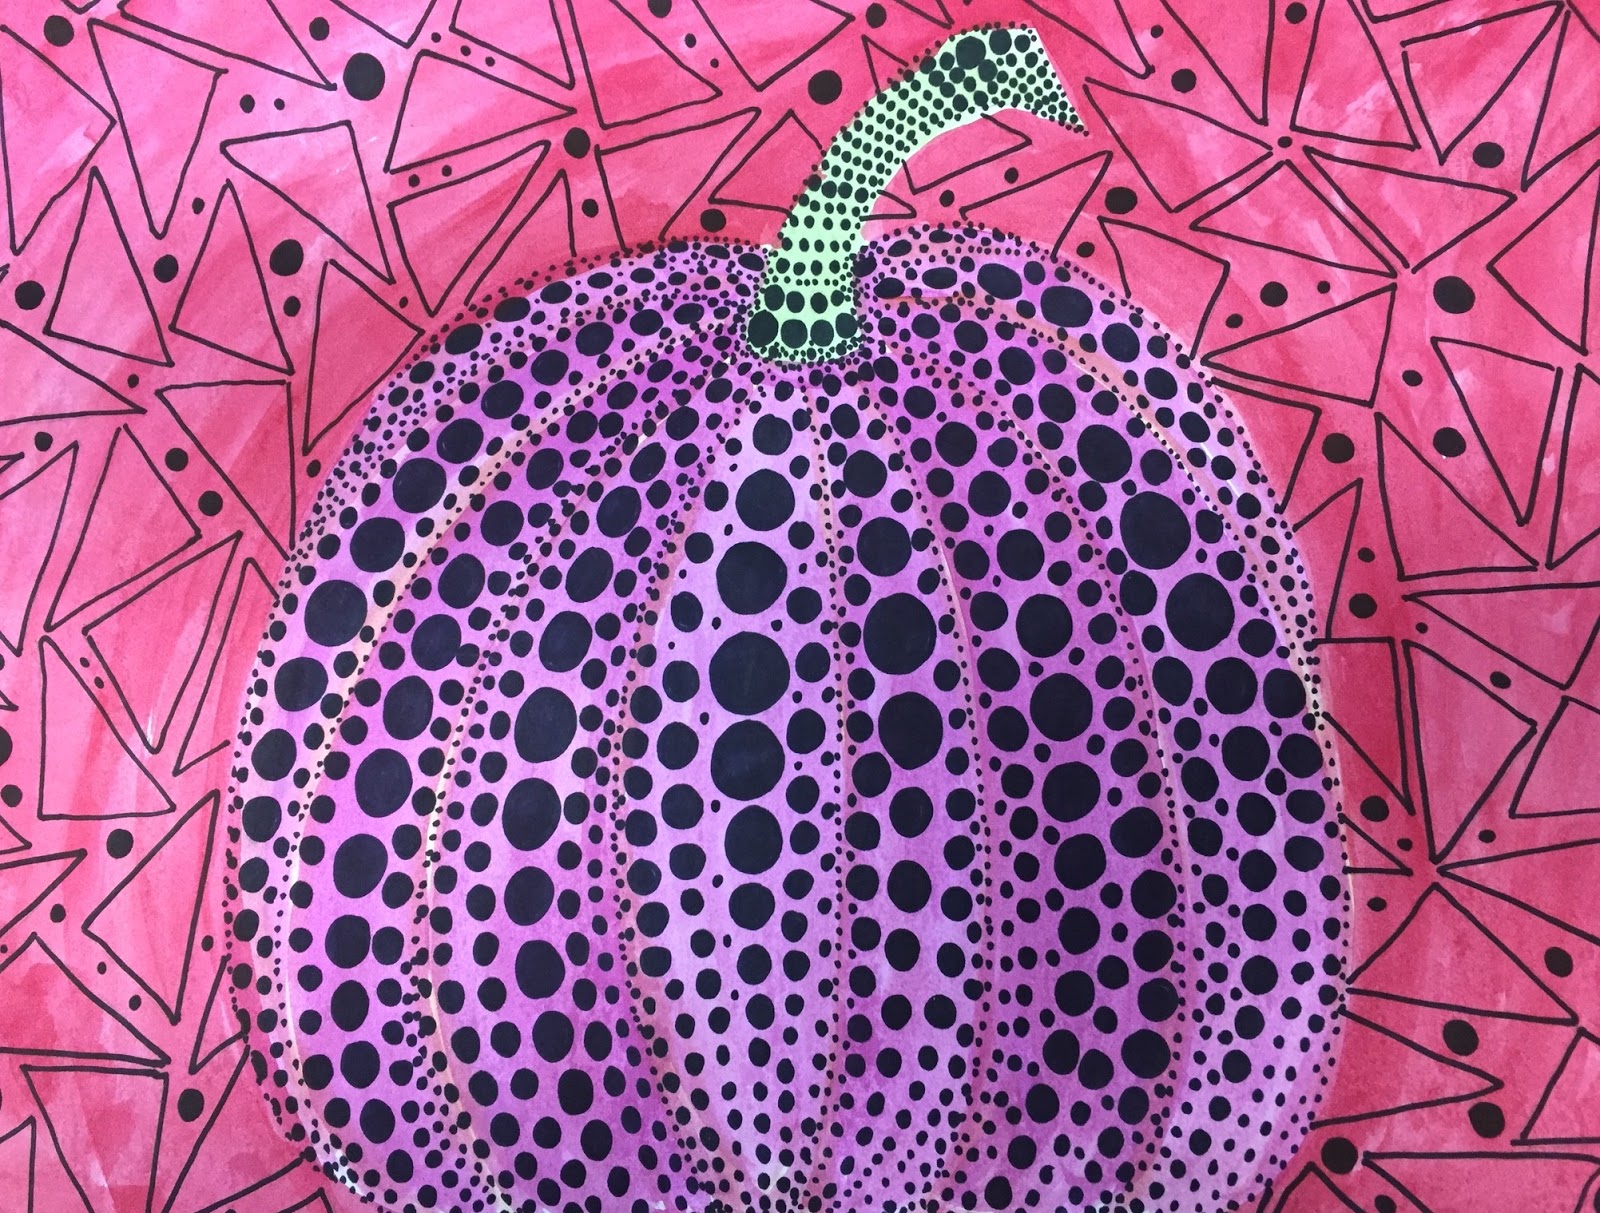
Yayoi Kusama’s pumpkins have become one of my students' favorite projects. Why, just the other day as I was rummaging through my file cabinet filled with inspiration, a few of my students were elbow deep in there with me. Suddenly one of my examples of a Kusama - Pop Art Pumpkin emerged to shouts of, “Hey, Mrs. C-G, this was my favorite! Can we do it again?”


I encouraged them to keep digging, and the entire time, the three 10-year-old archeologists kept reminiscing of last year when they created 
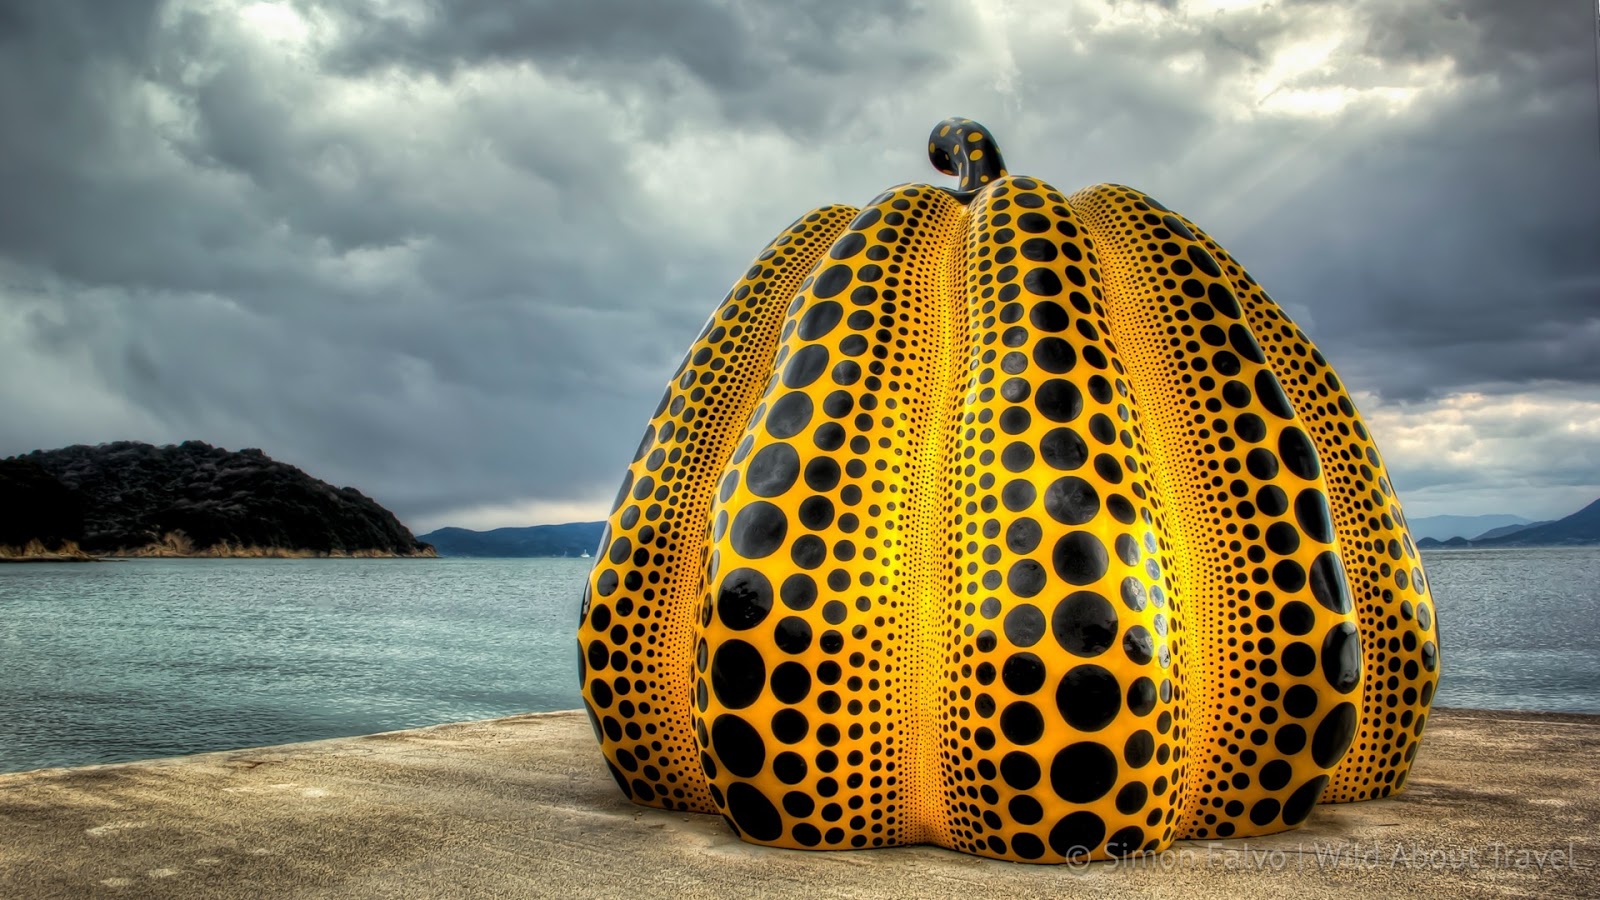
their own versions of Kusma’s Yellow Pumpkin in Naoshima.


This, I will admit, is one of my favorite lessons to teach, for so many reasons.

1 - I love teaching this lesson in the fall when the students all think we’re drawing pumpkins that will turn into jack-o-lanterns.  After all, what else would you do to a pumpkin? I then tell them we're going to cover them with dots. They think I've lost it. We plan, work tirelessly, and as projects begin nearing completion, we all start seeing spots.

2 – her avant-garde work lends itself to interpretation for elementary students. It’s bright, colorful, rhythmic, and encourages them to think outside the box. We add to this project the exploration of wax resist with liquid watercolors, which brings a new level of excitement during production.

3 –my mini galleries were introduced, years ago, during the first launch of this lesson. (See example below.)


Now, I’m not taking credit for inventing this idea, that goes to some other amazing art teacher out there. I am taking credit for not letting such a cool idea go by without using it. I love these not only for introducing the art and artist, but they're perfect for hanging with a hallway display to educate the viewers about the art and artist too.

4 – it’s a project in which everyone finds success! 

      …and they want to do it again. If only I’d let them.


Thursday, April 27, 2017


Kindergarten Magic Art


In the last few weeks of school, I teach a Kindergarten theme called Magic Art. Surprises and experiments are a fun end of the year way to keep students interested while teaching the elements of art. My students love combining literature and play with our art works.  Below are the lessons and books I use with the magic idea, along with the materials list. 

Abracadabra! Art is made.


Magic Line


Harold and the Purple Crayon, by Crockett Johnson

White crayon resist with white oil pastel lines on white watercolor paper make a beautiful line base.  When students brush watercolor paint over the white crayon, it causes magic oohs and ahhs. You can add salt and lemon juice for more magic fun!


I am so thankful to have a kindergarten teacher who makes room for artwork outside of her classroom!


Tissue Paper Dye Spring Flowers


Apply tissue paper to large watercolor paper with brushes and water. The magic occurs the second art period when they peel away the tissue paper to reveal beautiful color. I gave them a long narrow piece of watercolor paper, and then a bigger piece of paper for a second artwork. I knew they would be done quickly with the first paper, and they were! It does make a large dyed mess, but I always have wipes on hand and you can protect tables before the project starts. You definitely need a large area to dry them.


Mouse Play Dough Mix


 Mouse Paint, by Ellen Stoll Walsh
I pass out the colored play dough two primary colors at a time. Many kindergarten students will mix them all up at once and make a brownish color. My goal is to make sure they could merge the two primary colors to make secondary colors. Of course, as they are squishing their play dough, we pretend they are little mice, mixing up their colors before the cat sees  them.


Thursday, April 6, 2017

A Twist on Teaching Line


Kooky - crooked - spirals - wavy - bending - zig-zags - twirling - repeating - weird - wiggly. 

These were just a few of the adjectives that filled our art space discussion, as the third and fourth grade artists studied the art element line the other day.

Sure, you can always grab some drawing tools and have them draw lines, but this year I wanted to take our lines to another level. We made 3D lines using bright and colorful quilling paper. It's narrow, long, and easy to manipulate for the most part. A few Band-aids later, from all the paper cuts, my new approach to line study appeared to have been a success.


We curled, we bent, we rolled, we stretched - not only paper strips, but our imaginations. Our 3D sculptural lines and forms came alive with each new idea. My little artists were thrilled with the variety of lines that were emerging and interacting with other lines as our study continued. It appeared as if there were an endless supply of movement found in our creations and around the room as everyone wanted to share a new way they discovered to shape their lines. Gotta love collaboration!